


Breastfeeding: Everything you actually need to know before the first latch
Updated: Aug 12

If you are currently in your third trimester packing your hospital bag and nesting, congratulations! While most baby prep focuses on nursery decor and tiny outfits, taking a little time to prepare for your feeding journey before your baby arrives is one of the best gifts you can give your postpartum self.
I want to save you literal blood sweat and tears and offer critical things I learned the hard way as a Certified Lactation Counselor who has breastfed two babies. My goal is to give you practical, evidence-based tools before day one so your breastfeeding journey is set up for success, and what to do if it's not going as you imagined. Here is your ultimate prenatal guide from flange sizing, milk stages, and achieving a comfortable, pain-free latch.
1. Pack a Breastfeeding Friendly Hospital Bag
Purchase a Boppy Nursing Pillow and Bring it with you!
This is something that hospitals do not offer, but something I desperately needed for both babies following delivery. Babies have no neck support following delivery and rely entirely on you to position them well for a latch. This nursing pillow is incredibly helpful in the early days to position your baby in a comfortable football or cradle hold.
Purchase a Ninni Co Pacifier
I have used this pacifer for both my babies and now I use one for clients who are having latching issues. This pacifier was designed to reinforce a wide breastfeeding latch and avoid dentition issues later. Make sure to not overuse it or you might mask early feeding cues like lip smacking and rooting. You want to nurse on demand to ensure your baby's hydration and growth and establish milk supply.

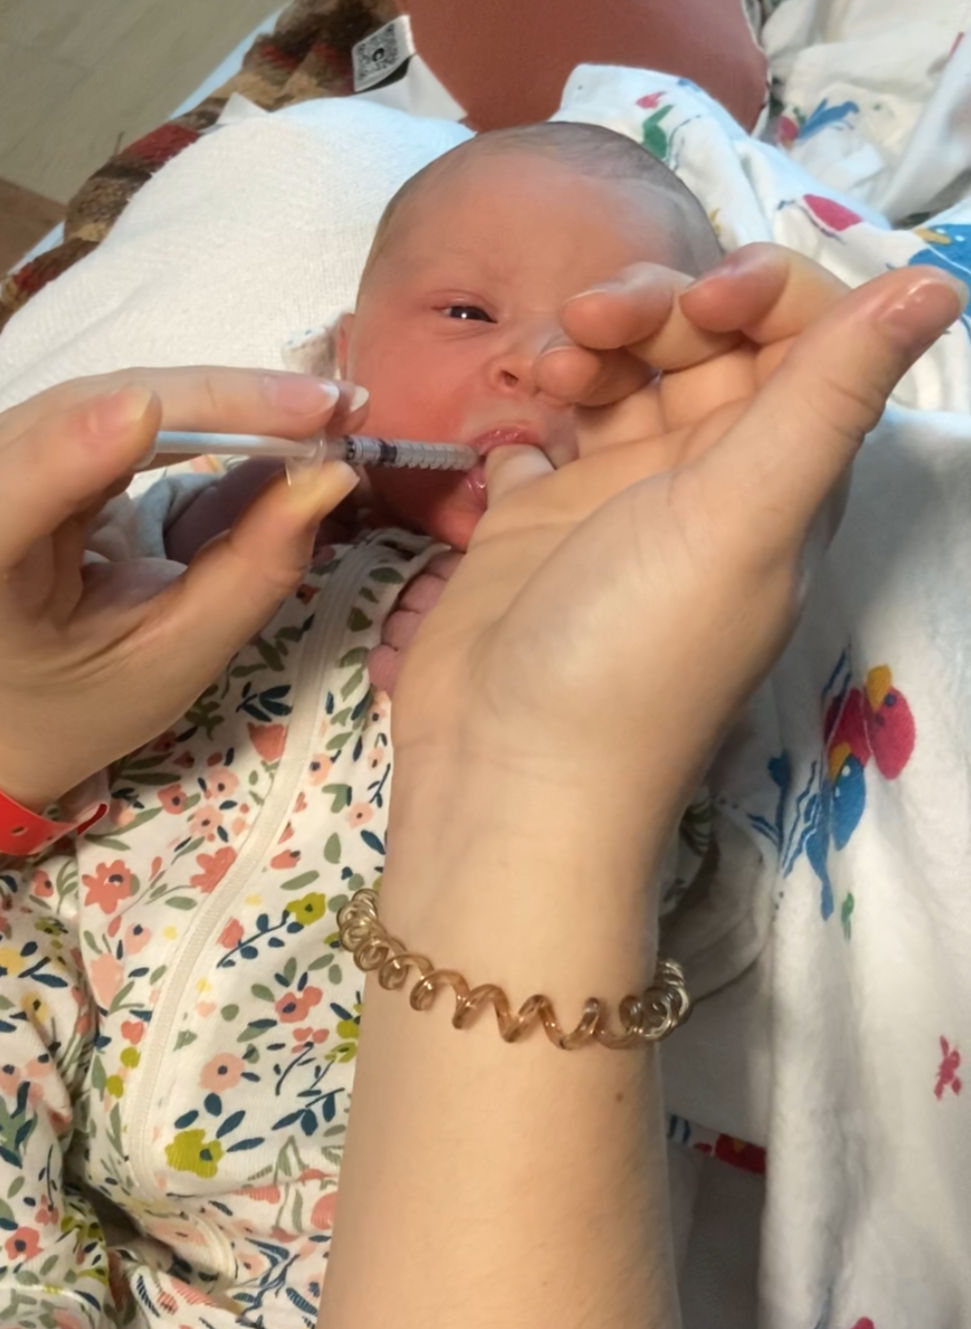
Learn Hand Expression and Purchase Syringes
Colostrum collection can begin around 36 to 37 weeks of gestation, provided your pregnancy is low-risk and you have clearance from your OB/GYN or midwife. Make sure to pack a cooler and icepacks for your trip to the hospital then write your name on the bag and store it in the freezer until you’ve delivered. After delivery, I let my babies suck on my pinky finger and put the syringe in the corner of their mouth and slowly squeezed the colostrum while they swallowed.
Colostrum expression is performed using hand expression rather than an electric pump, as pumps are generally too strong and can waste the very small, thick droplets of early milk.
Preparation & Warmth: Wash your hands thoroughly. Applying a warm compress or taking a warm shower beforehand can help encourage the flow of colostrum.
The C-Shape Hand Placement: Position your thumb and index finger roughly 1 to 1.5 inches back from the base of the nipple/areola (making sure you are compressing the breast tissue itself rather than sliding or squeezing the nipple).
Compress, Push, & Release: Press straight back toward your chest wall, then gently bring your thumb and index finger together behind the milk reservoirs. Release the pressure and repeat in a rhythmic, comfortable motion. Avoid sliding your fingers forward or pulling on the skin.
Rotate & Collect: As small drops appear, collect them directly using a clean oral syringe
(1 mL to 3 mL) or spoon. Once the flow slows in one spot, rotate your hand to a different angle around the breast (like shifting across a clock face) to express from other ducts.
Time Limits: Keep sessions brief—typically 5 to 10 minutes per side, up to 1 or 2 times a day.
Note: If you ever experience painful uterine cramping or contractions while expressing, stop immediately.

Grab a Flange Sizer and Inserts on Amazon
Most breast pumps automatically come with standard 24mm flanges, but most nipples actually measure between 15mm and 19mm. Using a 24mm flange when you need a 17mm can cause tissue damage, severe pain, and poor milk removal. A flange that’s too small can lead to clogged ducts and mastitis.
Pro-Tip: Buy a nipple sizer on Amazon before birth to measure your base diameter. You can use your insurance to get a breast pump before you even deliver, you just need your OB or midwife to fill out the form. Even if you never use it, it’s good to be prepared.
Why pack them for the hospital?
In case of separation: If you and your baby need to be separated after birth, you can use the hospital-grade pump to express colostrum and stimulate milk production.
Helping your milk come in: If latching your baby is severely painful, use a comfortable pump setup to bring your milk in without destroying your nipple tissue. Schedule an appointment with a lactation counselor for position and latch recommendations and see if you need to address oral ties and underlying body tension.
Purchase LacTeck Flanges
If you are going to be pumping long term, consider ordering a pair of LacTeck silicone flanges. These soft, flexible silicone flanges mimic a baby’s natural suckling and are more comfortable than rigid plastic. Whenever I was away from the kids for work, this is what I used to pump.
2. Realistic Expectations: Milk Stages & Stomach Size
One of the biggest worries new parents face on days 1–3 is: "Are they getting enough?" Knowing the natural timeline helps you trust the process. On Day 1, a newborn’s stomach is only the size of a cherry—holding just 5–7 mL (less than a ¼ ounce) per feed!
Because their stomach capacity is small, they need small amounts of milk frequently. Nurse on demand (whenever baby shows hunger cues) rather than following a rigid clock. This frequent feeding provides the opportunity for your baby to get exactly what they need and dictate your long-term milk supply.
Your Milk Takes Time to "Come In"
Days 1–3 (Colostrum): Your breasts produce thick, golden milk. It is concentrated liquid gold packed with antibodies, immunoglobulins, and nutrients.
Days 3–5 (Transitional Milk): This milk is still a bit yellow but beginning to thin and it will come in larger volume now. Your breasts will begin to feel fuller and firmer.
Weeks 2+ (Mature Milk): Mature milk is thin and white. Your milk supply stabilizes based on demand.

Transitional milk, 3 days after delivery

Mature milk, 5 days after delivery
3. Proper Breastfeeding Positioning and Latch
When practicing positioning, your physical comfort comes first. If you are hunched over or straining, every feed will feel exhausting.
Try the Football Hold with a Boppy
For newborns, the Football Hold (tucking baby under your arm along your side, supported by a Boppy or nursing pillow) gives you maximum control over their head and clear visibility of their mouth. My other favorite position was cross cradle.
Eliminate Body Tension: Nose to Nipple
Sit comfortably: Rest your back against pillows and bring your Boppy up to elbow height.
Align head naturally: Position baby so their head rests right where your nipple naturally falls.
Do NOT lean down: Bringing your breast down to your baby or lifting your baby too high causes neck and shoulder strain. Instead, support the baby's body so their nose aligns where your nipples naturally fall.
4. What If Latching Hurts Right Away? (Ties & Bodywork)
Breastfeeding should never be excruciating. While mild tenderness in the first few seconds can be normal as tissue adjusts, sharp, pinching, or lingering pain is a sign that something isn’t right.
Don't Suffer Through Nipple Trauma
If your baby’s latch is extremely painful from the very start, it is not your fault, and you do not just have to "tough it out."
A painful latch often points to underlying structural or tension issues, such as:
Oral restrictions (Tongue or Lip Ties): Ties can limit the mobility and function of the tongue.
Body Tension: In-utero positioning or birth trauma can leave a baby's neck, jaw, or shoulders tight, making it hard for them to tilt their head and gape widely to get enough breast tissue in their mouth for a deep latch.
What to do instead: If latching hurts, use your pump (with your correct flange size) or hand-express to feed your baby via cup or syringe and protect your milk supply while you seek support. A CLC/SLP can evaluate for ties and recommend gentle pediatric bodywork (like pediatric chiropractic or craniosacral therapy) to relieve tension before your nipples suffer severe trauma.
5. Step-by-Step Latch Checklist
Save this quick 5-step mental checklist for when you are in the hospital room or nursing at 2 AM:
Watch for Early Cues: Look for lip-smacking, rooting, or hands to mouth (don't wait for crying!).
Belly-to-Belly: Turn your baby’s entire body toward you so their head, shoulders, and hips are in a straight line. Support your baby at their shoulders, do not hold their head.
Nose-to-Nipple Alignment: Place your baby’s nose opposite your nipple so they smell it first and tilt their chin up. Aim for your nipple to go towards the roof of their mouth to stimulate their suck reflex.
Bring Baby to Breast: When they open wide, bring your baby in towards your breast, having their lower lip and tongue contact your nipple first to get an asymmetric latch.
Get Personalized Prenatal & Postpartum Lactation Support
You don't have to navigate your feeding journey alone. Getting a lactation evaluation or having an expert lined up for your first week home takes the stress out of feeding.
At Half Pint Therapy, I provide in-home Infant Feeding & Lactation Support throughout Rhode Island. I help you evaluate flange fit, infant oral mechanics, oral ties, body tension, and guide you toward a painless, joyful feeding journey. Book a free discovery call to learn more!
Some of the product links I shared are Amazon Associate links, meaning I earn from qualifying purchases. I only recommend products I truly trust for feeding development. Purchasing through these links supports my practice at no additional cost to you!
Comments